


How to Install a Venetian Chandelier: The Perfect Combination of Art and Beauty
Mounting a chandelier might seem a hard task. That’s why we at MuranoGlassItaly, would like to help you with a short guide on how to install chandelier in few steps. But first, let’s find out more about the beautiful Venetian chandeliers!
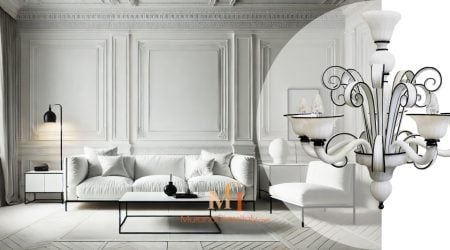
The chandelier is the most elegant and refined light source inside a house. Not only does it illuminate our spaces, but it is a design element that creates a welcoming atmosphere and communicates your style and personality.
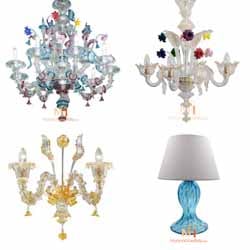
The most famous chandeliers are the Venetian ones, widely appreciated all over the world for their beauty and quality. Murano glass chandeliers have a unique history, each chandelier is indeed entirely handcrafted by professional glassblowers according to the traditional Venetian method.

Excellent craftmanship, attention to details and Italian design make each chandelier a unique masterpiece. Decorating your interior with a Venetian chandelier means bringing the timeless beauty of the Italian art to your house. Indeed, Venetian chandeliers are a symbol of elegance and luxury, and they recall the charm of the splendid Venetian palaces.
While remaining faithful to traditional glassblowing methods, today there are different types of Venetian chandeliers from the classic style to the most modern designs that can easily adapt to any type of interior. Murano chandelier are designed to be the focal point of any room and improve the overall design.
If you have already purchased your Murano chandelier and you are looking forward to admiring it, our short article will guide in how to mount and install your beautiful artwork easily at home!
How to install Venetian chandelier: instructions
Mounting a Venetian chandelier has never been easier! Follow our steps:
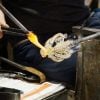
1. Unboxing
Since each chandelier is a masterpiece of the high value, once you received the chandelier, make sure to handle each piece with care. Our chandeliers are shipped disassembled and each piece must be opened carefully.
Some decorative elements could be vacuum packed. In this case it is important to cut along the outer edges of the package and carefully remove the transparent protective film.
Attention: do not tear the vacuum package as the contents might be broken, but gently cut the package.

Once you unboxed all the pieces, arrange them on a large surface and check that they are intact. On your table you should see the following chandelier parts:

2. Assembling the central body of the chandelier
In order to assemble the central body of the chandelier, it is necessary to identify the following pieces:
- Threaded metal tube
- Crown
- Olive
- Column
Insert the following elements through the metal tube: crown, olive and column.
After inserting the elements as shown in the photo, these will be fixed to the metal tube by two washers: one washer will be screwed at the end of the column and the other at the beginning of the crown.
Tip: do not screw the washers too tight: this stress might break the glass over time.
Once you assembled the central body, fix the hook from the end of the metal tube that is visible from the crown. The hook has to be screwed firm.

3. Adding the arm plate
Add the arm plate to the bottom of the central body and fix the elment using the washer.
The arm plate is the base on which the arms of the chandelier will be inserted.

4. Inserting the main electric cable
At this point it is necessary to pass the main electric cable through the central body and the arm plate.
Attention: Safety is of top importance when working with electrical cables. If necessary, get help from an electrician.


5. Assembling the nipple
Pass the nipple through the main electric cable and fix it to the metal tube that exits from the metal base. Screw the nipple with the help of a screw driver.
As shown in the figure, the electric cable will exit from the hole in the nipple.

6. Assembling the canopy
Once you assembled the central body and the canopy, the two parts will be joined through the chain. Hook the central body up to the chain attached to the canopy.
Pass the pin through the metal cup which will be covered by the canopy.
The canopy will cover the electric cables.

The canopy will be fixed by a particular washer called rosetta and a screw.

7. Hanging the central body
Once you assembled the central body and the canopy, the two parts will be joined through the chain. Hook the central body up to the chain attached to the canopy.
8. Assebling the chandelier arms
Insert each arm into the metal base. For each arm, insert first the cable and then the top part of the element. Do not screw the arms; they are made to fit perfectly the metal base and be balanced.
Adjust the distance between the arms so that the chandelier is symmetrical.

Once the arms are assembled, connect the electric wires of arms to the cables that exit from the central body.
Attention: If necessary, get help from an electrician.

9. Adding the metal and decorative base
Mount the metal base and the decorative base. These elements will cover the arm plate and hide the electrical cables.

Screw the final decorative part to the metal tube that exits from the decorative base. Do not to tighten too much so that the glass is not under tension.

10. Assembling flowers, low leaves, tall leaves and cups
One last step, your chandelier is almost complete!
Insert the tall leaves, flowers and low leaves in the arm plate. The decorative elements need to be simply inserted and not screwed on, taking care to position them in the correct hole in the arm base.
Attention: if you have any decorative elements left over, this is normal. Spare parts are usually always provided, such as a tall leaf, a low leaf and a flower.

Finally, gently place a cup on each arm of the chandelier.

Your Venetian chandelier is finally complete: relax and enjoy the atmosphere!
Some useful tips
The Venetian chandelier will be the main focus of the room. That’s why it’s crucial to choose the shape and style that best suits your interior and your preferences.
Within our catalog you will find a fine selection of the most exclusive artworks by our best Venetian artisans.
Furthermore, each chandelier can be customized in color, in the number of decorative elements (arms, flowers, leaves) and in size, so that it can reflect your preferences and adapt perfectly to your interior.